I first interviewed Coral Remiro in 2024. At that time, she was the farm manager at Earth Stewards, an urban farm in Kirikiriroa, Hamilton. We had a fascinating chat about the successful polycropping method she’d implemented on the farm.
What is polycropping?
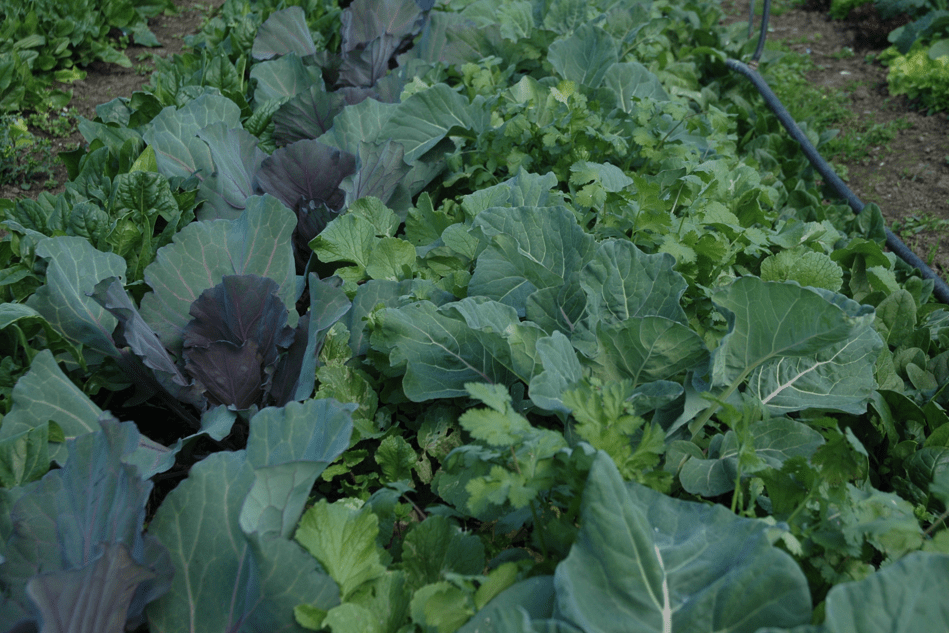
Polycropping is a technique that involves growing different crops together in a garden bed instead of using the more traditional monocropping planting method. It can be used in a small garden or larger growing system.
Spinach, cabbages, radish and coriander growing in a polycropping system
What are the advantages of polycropping?
Coral has found that one of the advantages of polycropping is an increase in the number of plants that can be grown in a small space. This has created more space to plant cover crops. She says, this has been a game changer as the cover crops reduce weed pressure, add a source of nitrogen, and provide more compost material.
Polycroppingalso increases biological diversity in and above the soil, directly helping to maintain a balanced system. Different insects, microorganisms, and other animals are attracted to the different habitats provided by different plants in close proximity.
Is polycropping complicated?
Polycropping is complicated until, as Coral says, “you can get your head around it.” She does not spend time these days considering companion planting so much as thinking about how plants grow. She explains that there are some key concepts to consider when grouping plants together including:
how much space is available around a plant as it grows
how long it takes for each type of plant to reach harvest size
light requirements for each plant
how different plants grow – vertically or horizontally
if the plants are root or leaf crops.
Hero plants
In her planning Coral thinks about how to create guilds – groupings of plants that support each other. She has found the best way to plan her garden is to organise plants into groups based on how long it takes for them to grow to harvest size:short, medium, and long-term. Plants like tomatoes and brassica take the longest to grow and she says these are the ‘hero’ plants. She suggests using these plants as a base to work around and then planting faster growing and smaller plants around these, for example, coriander and radish.
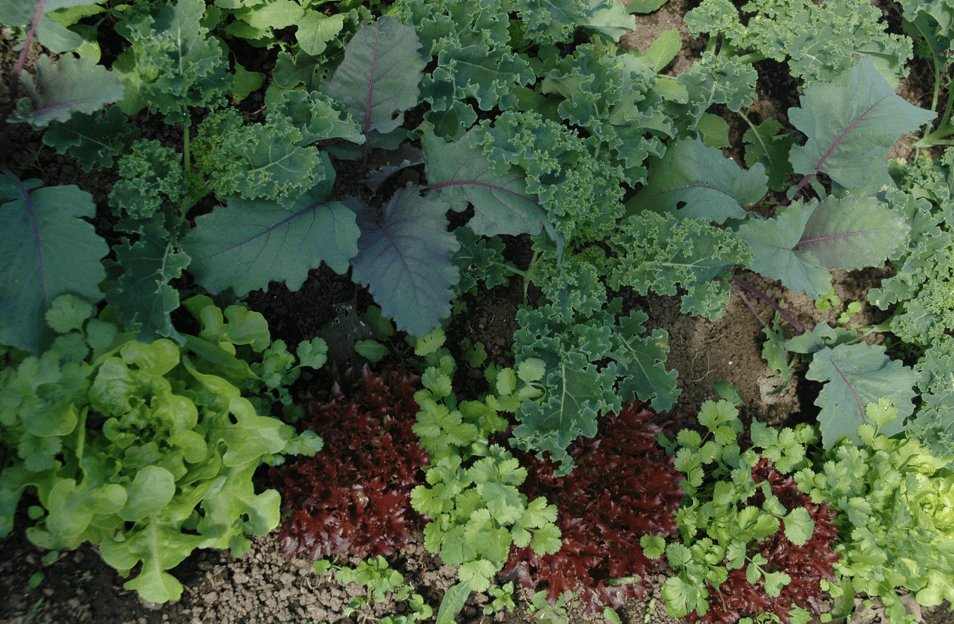
Kale, lettuce and coriander
The importance of record keeping
Like all gardeners and growers, Coral has learnt some lessons the hard way. For example, she planted lots of beetroot plants around other plants without considering how much light they needed. She says, one of the keys to success in polycropping is observation and recording what works well and what doesn’t. I would also suggest taking a photo before you forget – seasons pass fast!
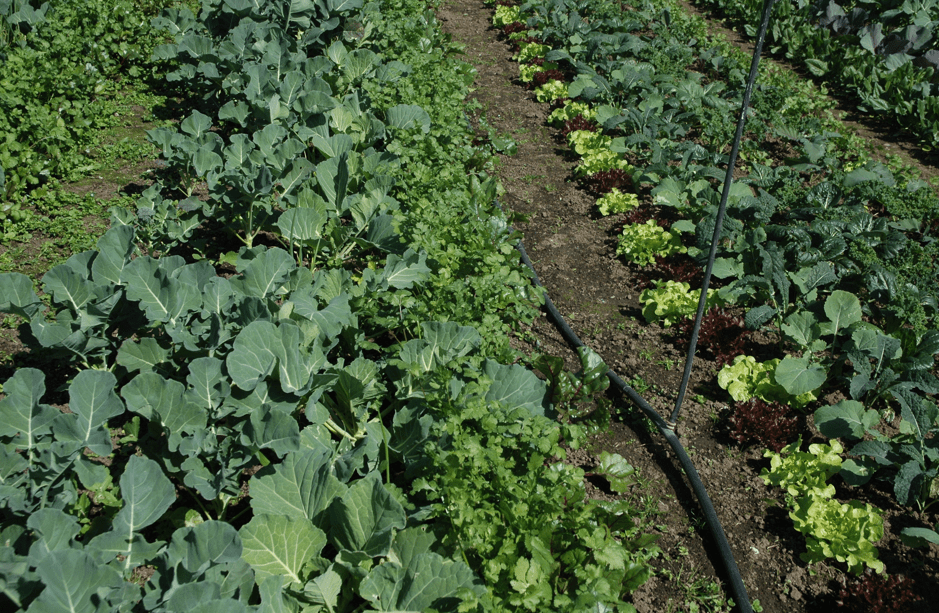
Brassica surrounded by a range of plants including lettuce and coriander
What I really appreciated when talking to Coral was her openness to trying new things in the garden. I also valued her approach to creating diversity. It’s always good to remember that in a garden, diversity can mitigate risk.
Visiting Earth Stewarts Urban Farm https://earthstewards.nz/ and chatting to Coral was an inspiration.
Crop rotation is simply organising plants into different plant families and rotating the plantings over time, or basically not planting the same annual crops in the same place each year.
Crop rotation does require some planning. If detailed planning is your thing, you can create a long-term rotation design with a detailed plan (probably more for a market gardener), or you can also keep it simple and incorporate at least some rotation around the garden.
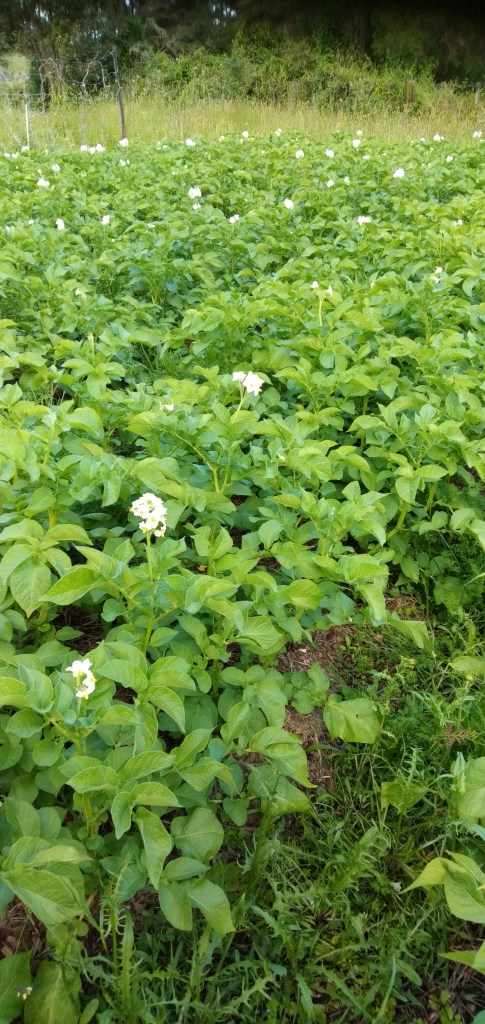
Sprouting purple broccoli flourishing after a crop of potatoes
Healthier Soil, Better Harvests
Different plants require different nutrient levels, so rotating your crops can help reduce the number of inputs you may need to use. A crop that is a heavy feeder can be followed by something that requires less nutrients, and a crop with deep roots followed by a shallow rooted crop.
Another advantage of crop rotation is reducing the potential for soil-borne disease. This is because plants in the same family are more likely to suffer from the same issues. For example, planting brassicas (e.g., kale, broccoli, cabbage, and cauliflower) in the same plot every year increases the risk of club-root, because the fungal disease’s spores can persist in the soil. It’s a good idea to leave a gap of at least three or four years between plantings.
Rotating crops can help reduce insect damage by preventing a build-up of damaging insects in a crop year after year.
Another advantage is different crops work on the soil in unique way, for example, deep rooting crops can improve the soil structure.
Different plant groupings
It is useful to have some understanding of the different families of plants if you want to use crop rotation. I also find it useful to keep seeds stored by the different groups in containers.
Leeks, onions, spring onions, garlic (Allium family)
Courgette, melons (Cucurbitaceae)
Carrots, celeriac, celery (Umbellifeae)
Tomatoes, capsicums, potatoes, and eggplants (Solanaceae – nightshade family)
Corn and grains (Poaceae – grass family)
Kumara (Conolvulaceae – bindweeds or morning glories)
Developing a crop rotation plan
There are many different examples of rotation plans available so I am not putting one specific one here and it really depends on your own set up. You might choose a more complex rotation that runs over a seven-year cycle and incorporates a couple of years of fertility building with cover crops (more for a market gardener). Another alternative for a smaller plot could be based on grouping your rotations by root crops, brassica, greens and legumes, and alliums. You would then try to have a long gap between replanting in the same bed those that are more susceptible to disease like alliums, tomatoes, brassicas and potatoes.
I find it particularly successful if I have an area that has been in a cover crop or a new bed that has been in grass, to start with potatoes to break up the soil, then I will then grow a range of brassica depending on timing as they require more fertility; if it is later in autumn and too late to get the brassica in I may just pop in a legume after potatoes such as broad beans over winter. Lettuce I pop in wherever I have a gap. Another successful rotation I have had is planting broccoli after kumara.
There are loads of great resources on rotation planting, so again how you plant depends on what you are doing in the garden and how detailed you want to be. And keep a record of what you plant where, you’ll think you’ll remember, but two years later it can be different story – jot it down or take a photo.
Diversity is still key
Whatever you decide to do in your garden, don’t forget the other principles to incorporate, mulching well, well matured compost and adding in lots of plant diversity. Add in flowers and natives wherever you can to attract all those beneficial insects and increase soil life – remember nature loves diversity and flowers can lift the spirit on a gloomy day.
It’s certainly a challenge managing those creatures that are in the wrong place in your garden. Knowing what to do and who to believe is difficult when you find an animal decimating your carefully tended crop.
Having a baseline can help us make garden decisions. With this foundation, plans can be made in line with your own ethics, climate, needs, and the surrounding environment. My aim is to grow organically, and I also try to create a diverse environment. This approach helps with my decision making.
Slugs and snails
An explosion of snails and slugs in any garden is an ongoing problem, especially during damp conditions. Most gardeners will attest that it’s pretty hard to get rid of any one species of animal permanently. Yet, there are some things you can do that can help create a balance.
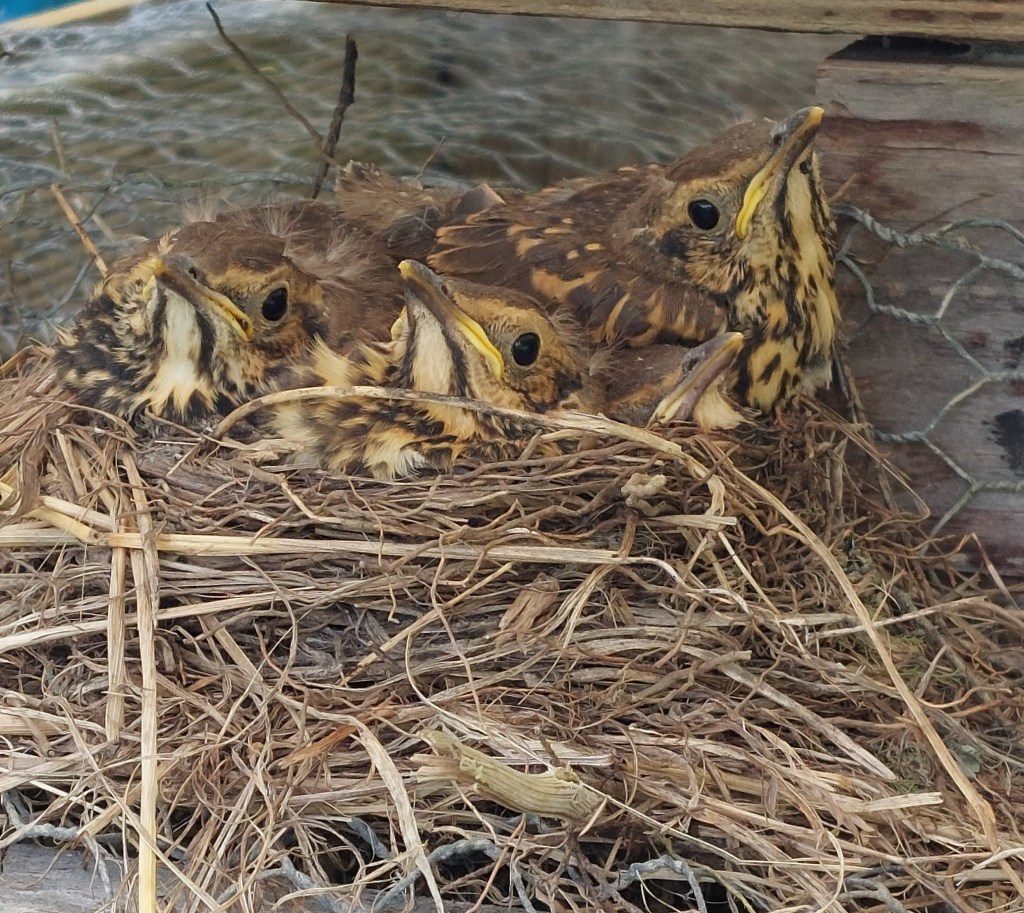
One way is to create habitats for the animals you want, while working to reduce the habitat of those you don’t. Some birds, like thrushes and blackbirds, eat snails and slugs so we encourage them. We try to create bird habitats with lots of trees and some scrubby areas. However, we also try to remove hiding places for slugs and snails. We do this by keeping the grass short close to the garden beds.
Without a cat around Mamma Thrush decided to have her babies close to ground level.
Another popular method is to place pots upside down on the garden patch. This encourages snails to gather. Then, you can move them away from the garden. Be sure to take them far enough away as they will work hard to find their way back!
Slugs and snails particularly like smaller or weaker seedlings, so strong healthy plants are often less vulnerable. Growing some seedlings larger before planting them out in the garden has been a game changer. This is especially true for those plants that are vulnerable. You can read more about this here.
Sometimes it is also worth allowing one plant to act as a sacrificial plant. Leave it in place to let the slugs and snails eat it. This way, others can continue to grow strong. It seems counter intuitive, but we have had some success trying this method.
It’s also good to observe your garden to see what is chewing on your plant. Check at different times of the day. What looks like slug damage may in fact be something else.
Larger animals
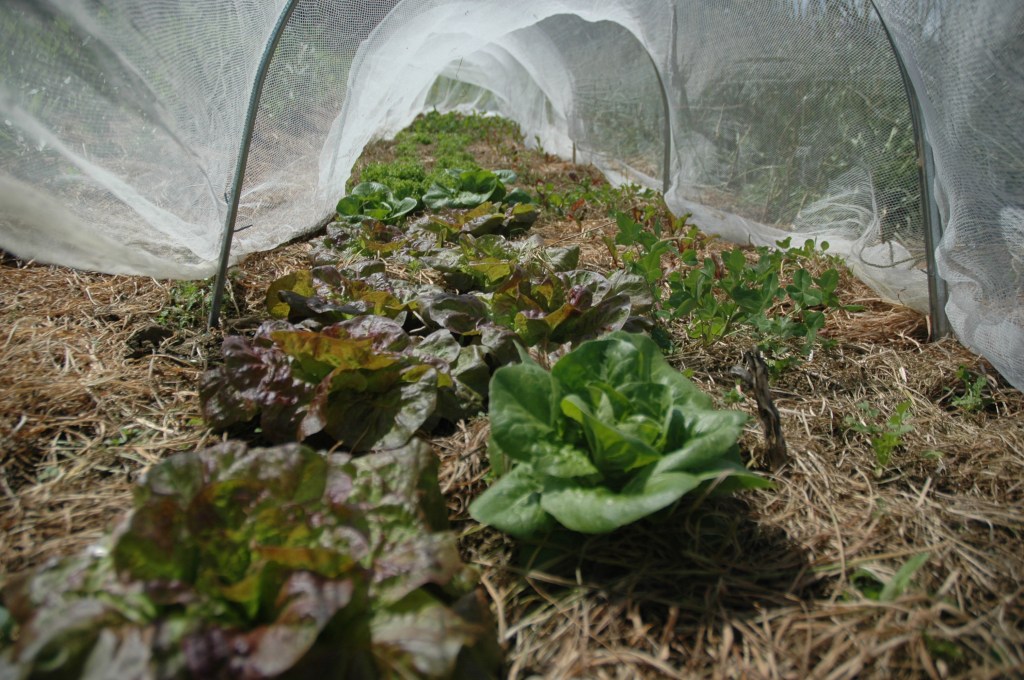
You can protect your plants from seed and fruit eating birds by using netting. This method also works against small mammals. It’s a good idea to use netting that is small enough, so birds won’t get caught in it. Always keep a close eye on it and check daily in case there are issues.
Covering seeds in the ground with a green shade cloth can protect them before they germinate. This prevents seeds from being disturbed by birds. For carrot seeds this also helps to keep the soil moist which helps the seeds germinate.
Insects
Celebrate insects! It means you have diversity. But of course, you don’t want to lose all of your crops to an overpopulation of certain insects. Having a wide variety of plants in a garden is therefore very beneficial. Diverse plantings help diverse insect populations thrive.
Flowers of different shapes and sizes will support different insects’ feeding habits. For example, the small hoverfly, often referred to as a beneficial insect, needs different things at different stages. At the larvae stage, they feed on insects like aphids. At the adult stage, they will need flowers for pollen and nectar.1
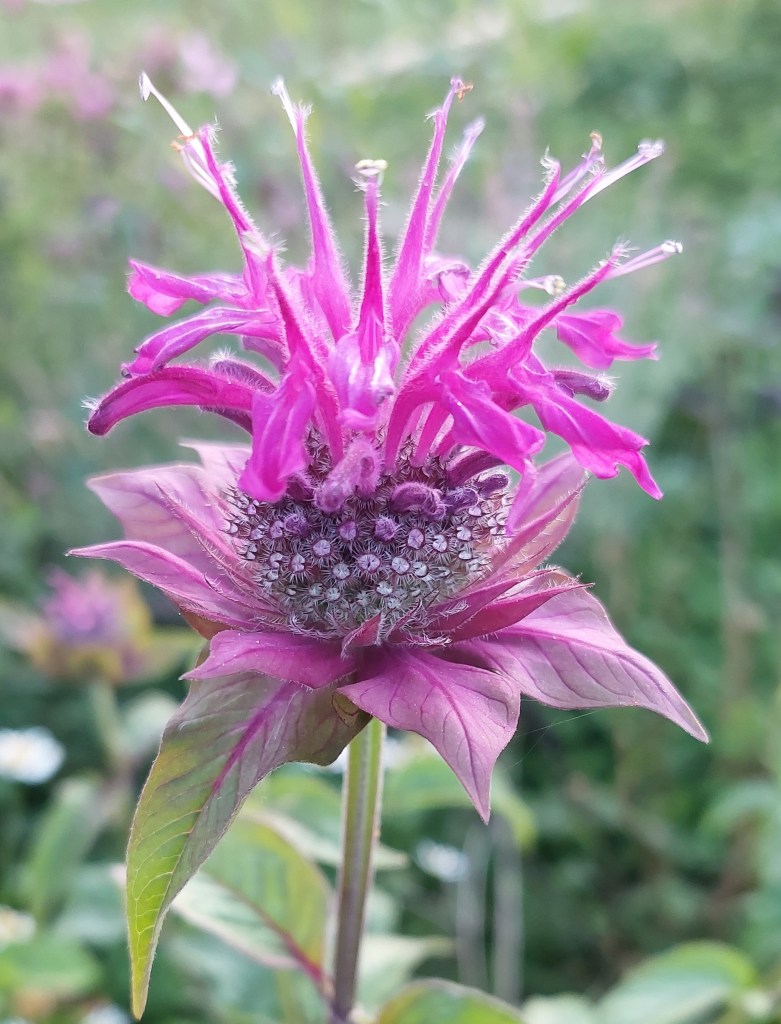
Flowers entice insects and humans alike!
Create permanent habitats to support beneficial insects. You may wish to keep a section of the garden for perennial plants. Alternatively, dedicate a row in your vege patch. This allows for some longer-term insect habitats.
Aim to have flowers all year round, both native and introduced. Plant some eco-sourced natives to encourage native insects. Don’t forget about our native bees, ngaro-huruhuru. Other easy to grow plants to encourage beneficial insects include phacelia, alyssum, buckwheat, bergamot, cornflowers, chives and marigolds.
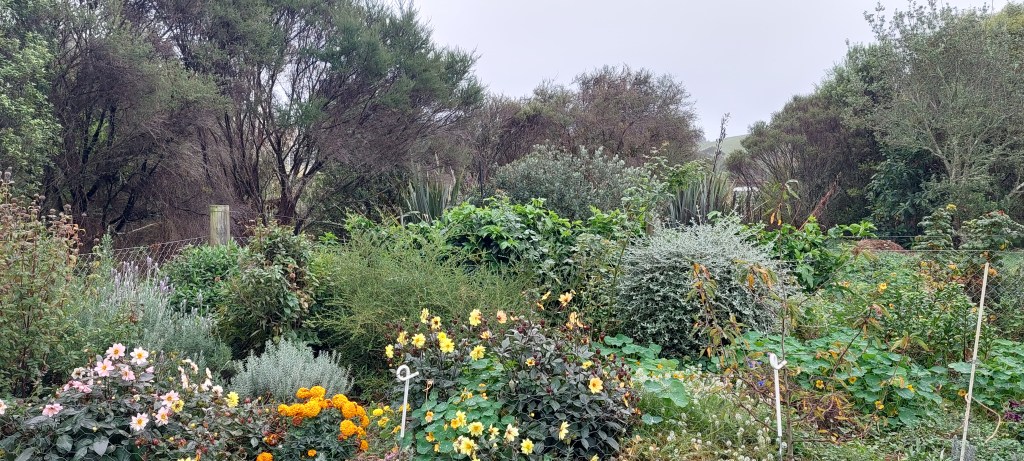
One of our wild and mostly perennial insect habitat plantings.
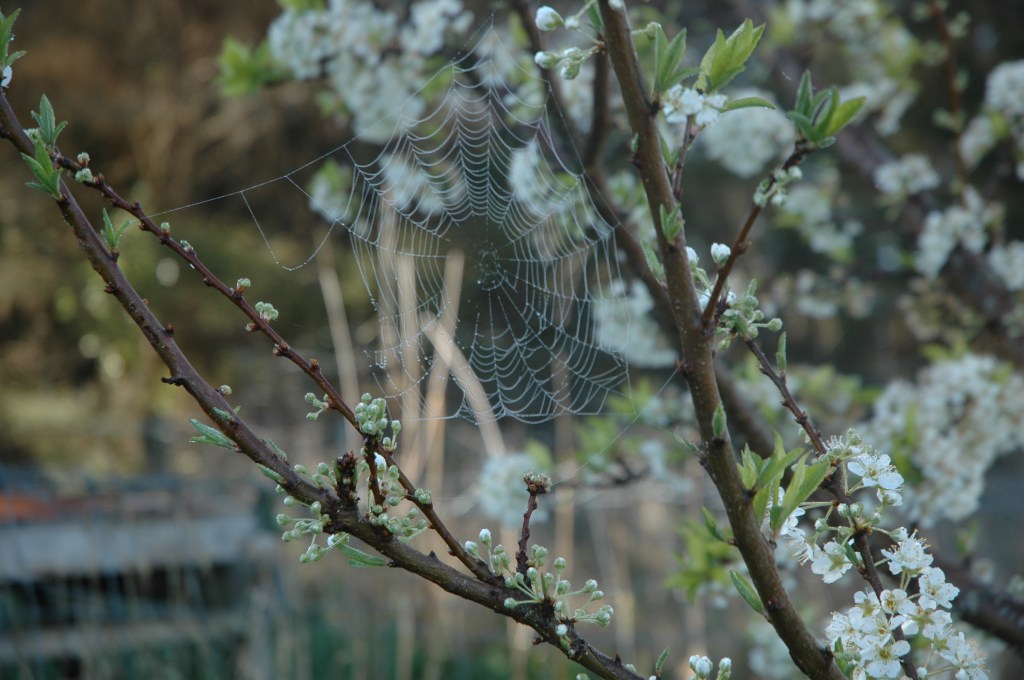
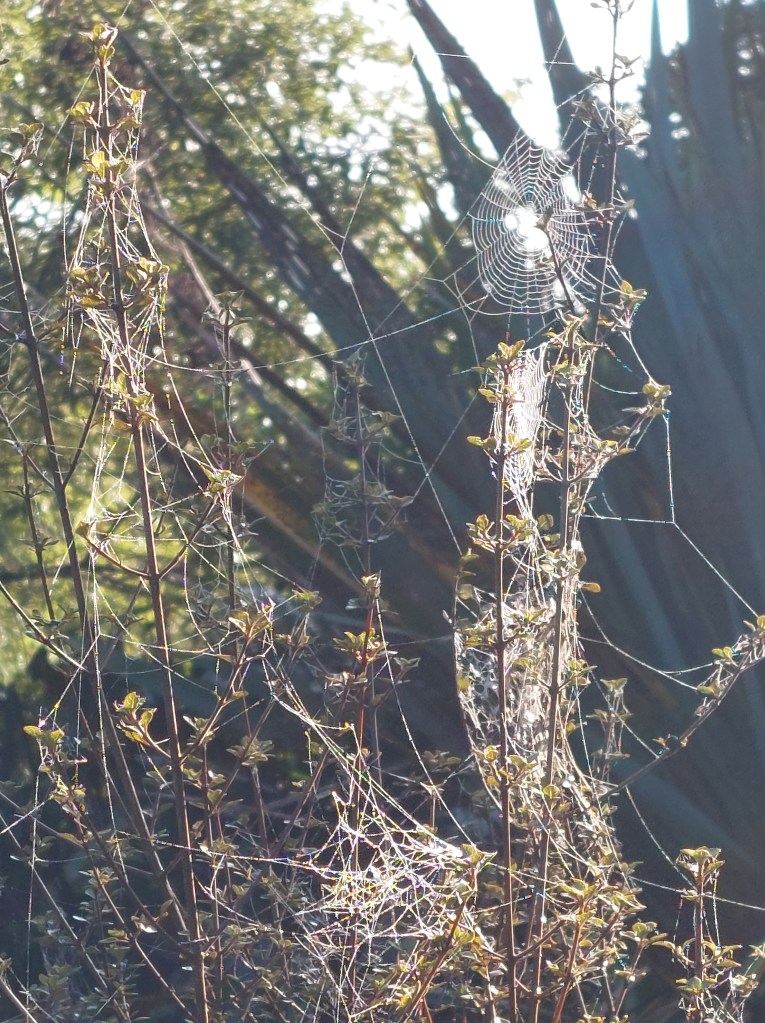
Spiders
I’ll finish with the wonderful spider. They are a good sign that things are going well, and you have a diverse environment. They eat both the bugs you want and those you don’t. However, they can help prevent an imbalance of one species.
Above all experiment and play in the garden. Even commercial and experienced growers sometimes lose crops and must go back to square one. It’s also another good reason to create diversity and spread the risk.
Disclaimer The information provided on this site is for general guidance only. Users of the information contained on this site must make their own assessment of the suitability and appropriateness of the products, services and information for their particular use.
In this interview, I chat to Iain Tolhurst from the UK about using woodchip on his farm.
I discovered Iain Tolhurst’s work when I Googled Veganic in 2016. Tolhurst grows certified organic food on leased land for a box scheme and farm shop in the UK. He has been growing without using animal inputs such as manures and blood and bone, on just under 20 acres (about 8 hectares) for 35 years. His farm was described in George Monbiot’s 2022 book Regenesis as “a genuinely regenerative, organic system”1 using no artificial or livestock inputs and creating a space for diversity and wildlife to return.
Tolhurst grows about 100 different varieties of vegetables on his farm. He uses a system of long seven-year rotations and times the planting of the various crops to fit their differing fertility needs. When a plot is at the end of five years, he takes it out of production for two years to build the soil fertility using green manures of legumes and wildflowers to which he also adds ramial woodchip.
It was his use of woodchip that I was particularly interested in when I asked for an interview. Woodchip offers a good addition to the growing toolkit of alternative solutions to using manures, other animal inputs or artificial fertilisers in gardens and growing systems.
Woodchip at Tolhurst Organics
While we are used to seeing woodchips around fruit trees, on ornamental perennial beds and in forest gardens, using it in vegetable beds often raises questions about nitrogen lockup and soil health. Nitrogen lockup can occur when a carbon-rich material, such as woodchip, creates an imbalance in the soil. However, Tolhurst agreed to the interview as he wanted to highlight the potential of using woodchip in horticultural growing systems.
At Tolhurst’s farm, they use woodchips in various ways; as a propagation substrate, a seedling mix, applying it directly to the plots to build fertility and as a weed suppressant on pathways in tunnel houses. However, he explains, the key to the system working and avoiding nitrogen lockup, is to use different forms of woodchip, appling it correctly, and timing the harvest of the woodchip.
Tolhurst sources the woodchip for the farm from local arborists and it comes from a mix of trees, usually from local gardens. Using local material also reduces the carbon footprint of transport, an issue with many fertilisers. Tolhurst explains that the woodchip is very different from wood shavings or sawdust, as using these would cause issues as they are difficult to compost.
Woodchipsandcomposting
Once the woodchip arrives on the farm, it is composted in a long pile called a windrow. This is turned four times in the first year, after which it is applied directly in the tunnel houses as compost.
To make a seed-raising mix, they also keep some of this composted woodchip and continue composting it for another six months to two years. At this stage, it becomes very crumbly and there is not much visible woodchip left. They then grade it and add a little vermiculite. In Tolhurst’s experience he says, it acts as well as any peat-based material. Finding an alternative to peat-based material has been important in their search for alternative fertility-building materials, especially in potting mixes.
Ramial woodchip
Ramial woodchip is an exciting development in growing systems and growers are experimenting with its use. Ramial woodchip is chipped branch wood sourced from branches less than 7cm in diameter and excludes any wood from the tree trunk. The reason for using chipped branch wood is it has a lower carbon-to-nitrogen ratio than trunk wood and, as the chip is applied fresh, it retains many of the tree’s nutrients and energy in the chip.
Tolhurst explains that he uses ramial woodchip in very modest amounts and adds this into the green manure phase of the growing system. Because they are in the UK, most of their ramial woodchip is harvested in winter and this works well as many of their indigenous trees are deciduous.
At Flowering Bean Organic Gardens, we are exploring using ramial woodchip from introduced deciduous trees and may experiment with some branches from native non-deciduous trees. Not scientific, but certainly a fun to experiment to see what happens in our growing system.
A mixed cover crop that has had ramial woodchip added for fertility Flowering Bean Organic Gardens
Woodchips on pathways
The other application of woodchips at Tolhurst Organics is the more traditional use of woodchips on pathways. The advantage, Tolhurst explains, is that the woodchip suppresses weeds and adds fertility as it breaks down and the fertility moves across into the beds carried by microorganisms. They lay it about 7cm thick and it reduces weeds for about 2 to 3 years before it is topped up again.
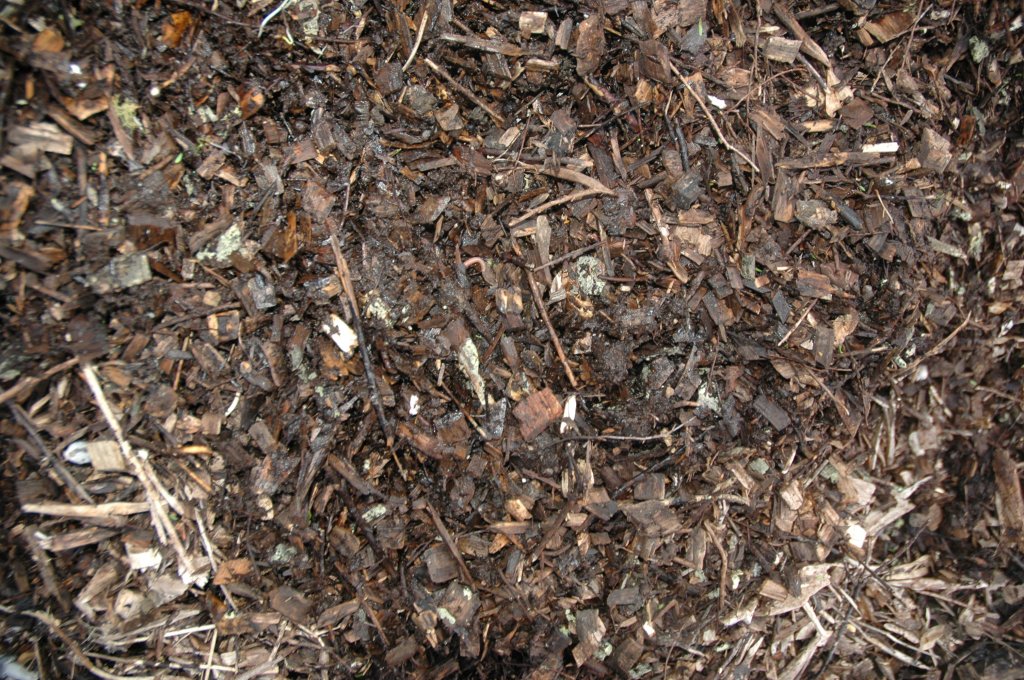
Spot the worm! Woodchip pile full of worms at Flowering Bean Organic Gardens
Talking to Tolhurst and learning more about the innovations on his farm, was certainly inspiring and I know there are many here in Aotearoa trying out new systems and ideas in both commercial and residential gardens. I hope this interview inspires and provides an introduction to the huge topic of using woodchips for fertility.
For anyone wanting to do a deep dive into using woodchip in gardens and farms, I found the Woodchip Handbook, A Complete Guide for Farmers, Gardeners and Landscapers by Ben Raskin and published by Chelsea Green Publishing had lots of great information.
Don’t forget to always consider your safety when working with woodchip and compost materials. Here are some links to more more information about protecting your health when working with composting material.
Cover crops are plants that are grown specifically to cover the soil, rather than to provide food for humans. However, they do provide food for all the organisms that live below the soil surface.
Why are cover crops useful?
Cover crops are usually grown when the soil needs a break, to build fertility or to address specific issues in the soil. Cover crops can help reduce weeds, slow runoff and support the water-holding capacity of the soil. They can also accumulate and recycle nutrients and add in organic matter for those plants that will, in turn, feed you.
Getting the best out of cover crops is a lifelong learning, but the good news is that they can reduce a gardener’s reliance on synthetic fertilisers or animal manures.
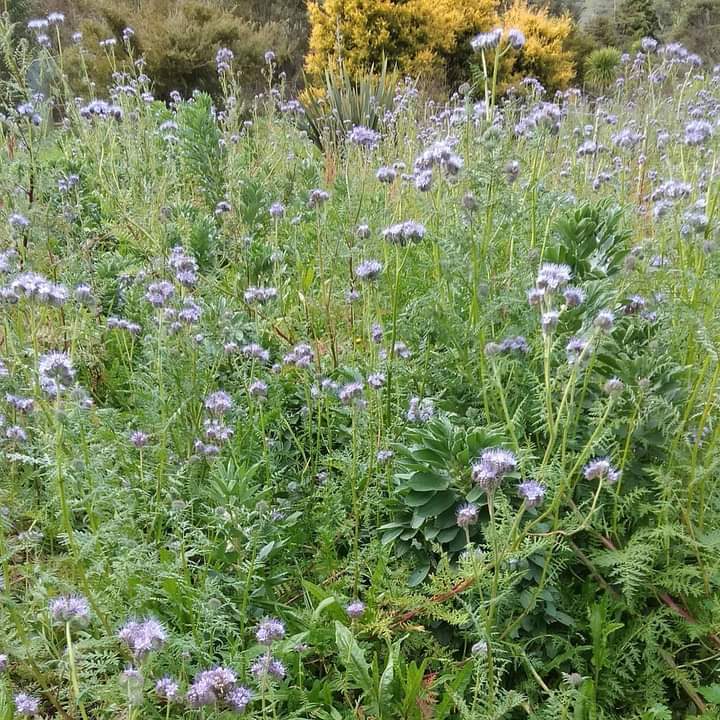
Phacelia and broad beans
What is a green manure? While exploring the world of cover crops, you’ll come across the term ‘green manure’. A green manure is simply a cover crop that has been turned in while still green.
Cover crops can be grouped as legumes, non-legume broadleaf crops, and cereals and grasses.
Legumes
Legumes are plants from the Leguminosae (Fabaceae) family, examples include clover, lupins, beans and peas.
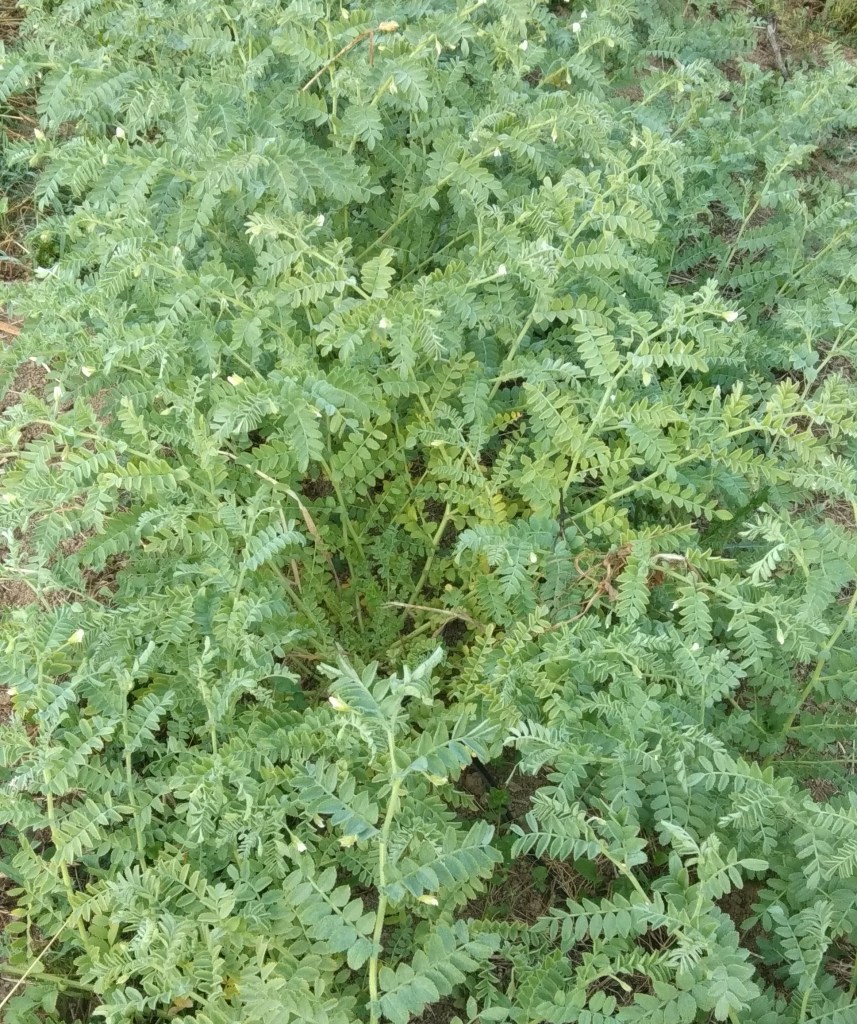
Chickpeas are legumes
The process of nitrogen fixation
Legumes are known for their nitrogen-fixing properties because of their relationship with nitrogen-fixing soil bacteria called rhizobia. As a legume seedling grows, these bacteria move into the roots of the plant and reside in the root nodules and here they exchange the nitrogen for organic compounds produced by the legumes. Nitrogen fixation varies between plant species, the timing of harvest, and whether the right nitrogen-fixing bacteria are actually present in the soil.
Building fertility with nitrogen-fixing plants
To make the most of using nitrogen-fixing plants as green manures, we need to look for legume varieties that we will also be happy to cut down when they are just starting to flower. As the plants break down in the soil some nitrogen will then be available future crops.
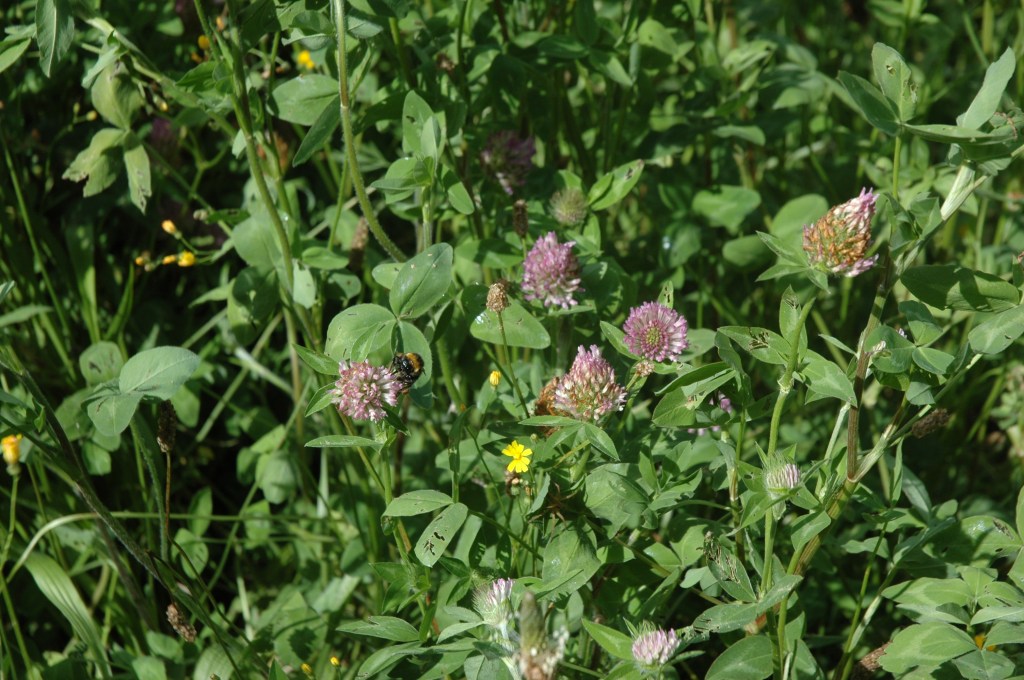
Red clover
Other nitrogen-fixing plants
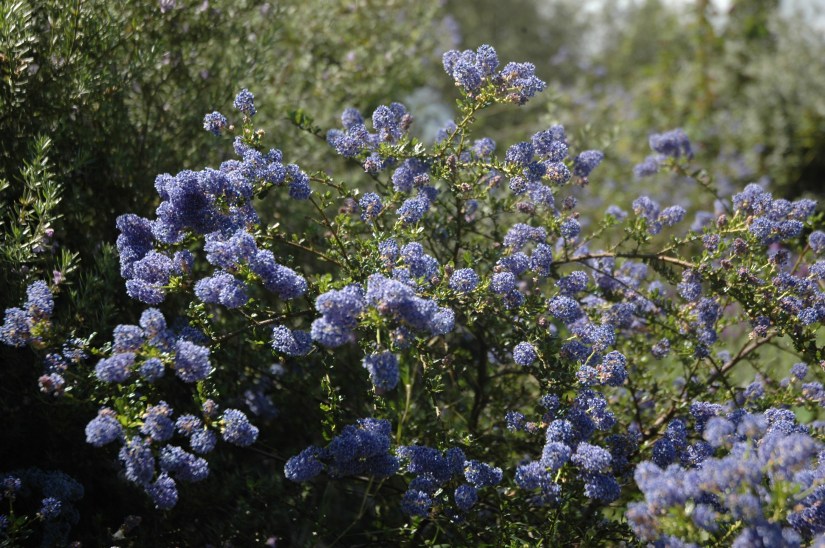
Legumes are not the only nitrogen-fixing plants and there are species of perennials, trees and shrubs which fix nitrogen. Many of these make a useful addition to the garden as they can support fruit trees and other plants. Some have the added benefit of adding beauty to our garden, for example, the kōwhai and california lilac.
California Lilac (Ceanothus)
Non-legume broadleaf plants
Broadleaf plants that do not fix nitrogen are also beneficial in a growing system. Phacelia is one of my favourites, and if I leave some of the crop to flower it looks beautiful and provides lots of bee food. Buckwheat is another quick-growing crop and will also grow in less fertile spots, adding a bit more life to your soil. Chicory is a very deep-rooted perennial broadleaf, planted to tap nutrients deep in the ground with long roots.
Cereal and grasses
There are various types of cereal crops, such as oats and wheat, that can be used to cover the soil. In autumn, a pre-mixed cereal crop can go in to cover the soil during autumn and winter to prevent nutrients from leaching out. This can then be turned in or cut and dropped in spring while it is green before planting vegetables. You may also wish to let some go to seed and dry out before harvest to use as a carbon source for a compost heap.
What are cover crop mixes?
Many garden stores now have specific cover crop/green manure mixes which contain a mix of seeds for planting at different times of the year and for different situations.
What is the best cover crop mix?
The best green manure will depend on the time of year, your climate and what your goals are for your garden. In our garden, I use lupin, phacelia and buckwheat because they are generally easy to grow and a fast cover for a garden bed. I also make use of red clover which I grow over two years along with other broadleaf cover crops such as chicory, as part of a long-term strategy to raise fertility when a bed is resting and before I plant potatoes.
Some cover crops are reputed to have additional functions in your garden. Mustard is said to reduce wireworm or marigolds to reduce nematodes.
A couple of other things
When planting a cover crop, it may be necessary to initially cover the ground with netting to prevent birds or mice from eating the seed.
If you decide to chop and drop plants rather than turning in, it’s important to keep in mind that the organic matter will take longer to break down. However, some root matter will still break down beneath the surface.
If you are turning your cover crop in, you’ll need to wait for two to four weeks for it to break down before planting.
Chickpeas are still a novelty plant in gardens in Aotearoa, but one I think should become a staple. While the space required for a large harvest is not feasible for a small garden, I would still recommend them. They are beautiful, graceful plants and extremely easy to grow in the right conditions. I have also used chickpeas as a cover crop and experimented interplanting them with other crops.
Sowing chickpeas
Sow chickpea seeds directly in an area that gets at least 6 hours of sun. You will also need to be sure the area has good drainage.
Chickpeas can be planted in succession from spring through to early summer and after the danger of frosts have passed, although they can survive a light frost after planting. I have also sowed chickpeas in early autumn as a cover crop rather than for harvest.
Sow seeds about 30cm apart in rows spaced 50 cm apart. They can also be planted in a grid pattern with about 50cm between each plant. This spacing allows the plants to grow and shade the soil, which helps retain moisture during the summer. However, if you live in an area with high humidity, wider spacing will allow more airflow between the plants.
Waterand mulch
Chickpeas can grow in quite dry conditions, but keep an eye on the soil and if it is dry, they benefit from a good water. Where we live, water can be a precious commodity in summer (although not always!) so our chickpeas don’t usually get any extra water throughout the summer. During a particularly harsh summer, I noticed the plants suffered, but still outperformed many of the other plants.
If you grow chickpeas in pots, they will need regular watering. It is a good idea to water them directly into the pot rather than above to reduce the potential for disease.
Mulch also provides a protective layer and helps prevent soil from drying out, regulates the soil temperature and suppresses weeds. There are a few options for mulching chickpeas, which are usually planted directly:
Place the mulch around the plants once they are about 5 cm tall.
Plant seeds into an area that is already mulched by pulling some mulch aside when planting.
Grow chickpeas in trays first and then plant them out once established in a mulched area.
Harvesting chickpeas
Growing chickpeas through to the dry stage does take a while, with harvest after about 100 days in late summer. Before harvest, it is best to let them completely dry on the plant and then chop the plant from the base. If wet weather threatens, you can finish under cover if they are very close to being dry.
After harvesting, hang in bunches to finish drying in an area with good air circulation (we have also found spreading them over our clothes horse worked well). Once the pods start splitting and the peas are hard (you cannot make a dent with a fingernail) remove peas from the pods and store. Harvesting is a little time-consuming as they grow in small pods, with only one or two peas per pod. They also don’t pop out of a dry pod as easily as other dry beans. The dry plant then makes a great brown carbon addition to the compost.
Probably one of the hardest issues you will face growing chickpeas in New Zealand is getting the seed. I have also seen them for sale as seedlings, so they are starting to appear in Aotearoa. Perhaps we’ll even see some different varieties of chickpeas become available in the future.
The soil beneath our feet has more life than we humans can possibly imagine. It was something which l, like many gardeners, had never given much thought to except when I saw visible animals such as earthworms. However, as we’ve started to understand some of the science of the soil, many growers and gardeners have changed their focus to nurturing the diversity of life below the soil surface.
My interest began when I stopped relying on most types of commercial composts and I had to learn the longer game of building fertility. Mulching was suddenly much more important as I learnt it was central to keeping the soil, the micro-organisms, and in turn the plants, in good health – building and retaining fertility in the garden.
The many benefits of mulch
Mulch keeps moisture in the soil in dry periods, helps retain warmth in winter and reduces weed pressure. Organic mulches add nutrients to the soil as they break down and are moved into the soil by earthworms and microorganisms. Mulches are important as they reduce the run-off of precious minerals from our soil by adding a protective barrier. This reduces the amount of runoff into our waterways, something we need to consider in cities as well as on farmland. So many benefits to a layer of mulch!!
Types of mulch
When using mulch, like all gardeners, you will have your preference on the look of your garden. Many people love a pristine garden, so the choice of mulch is important, others are happier with a messy look. It is individual preference. But I suggest, whatever the look, we should also be concerned with is what is going on under the mulch, rather than just what it looks like on top of the soil.
Mulching materials vary and what you use depends on what is available. We use a mix of mulch materials including long grass – cut with a scythe or weed eater before it goes to seed. When we apply it to the surface of our gardens we spread it in layers, gradually building it up over time to prevent it from heating up as it decomposes. We compliment this with compost when required.
There are lots of different materials you can use as a mulch including:
clippings from your perennials
weeds – but make sure you get them before they have gone to seed and don’t use those more determined weeds, such as creeping buttercup, as they may still continue to grow
cover crops – cut and dropped
compost
living mulches – you can use plants such as clover for underplanting. We’ve had success underplanting courgettes with red clover and have used it in the tunnel house pathway cut and placed around the plants.
A few other pointers
Woodchip as mulch is a big topic on its own and one I will devote an entire blog to at a future point. There is much debate about when and where to use woodchip, but one great place to start is to use it on pathways. Here it keeps the weeds down and any fertility from the woodchip will move across into the beds as it breaks down.
Think about what you are trying to achieve with the mulch. If it is for heat loving plants, then mulch when the soil has warmed to keep in the heat and try to apply mulch before the winter cold and rain sets in.
Finally, don’t forget your container plants, mulching will help retain moisture and keep the soil life happy in your pots.
Along with green manures, crop rotation and mulching, making great compost is another useful skill to add to your garden toolkit. Unfortunately, it can be a challenge to buy in commercial compost that is free from factory farmed chicken manures and slaughterhouse by-products such as blood and bone. These ingredients do add nitrogen and nutrients to the compost, but can you do without these?
The first step is to recognise that we can use the fertility straight from plants and the wonderful interaction of all the animals and micro-organisms in the soil and we do not have to process this fertility through a select few species of animal. Composting is just a way of speeding up natural decomposition and activating all the microorganisms. Of course, you can also chop and drop your plants and let the microbes do the composting in situ, but excellent quality compost can really support your garden and you can also sift and use it for your seed raising mixes.
You don’t necessarily have to spend lots of money on compost bins, bays, activators or complicated systems. Nature already has a wonderful system and composting will just happen where you place the materials. I used to compost in divided bays, but I have found these just got in the way when turning the pile and now I just pile things up. Although for aesthetics and keeping a garden tidy these can be advantageous, especially in smaller gardens.
What is the difference between hot and cold compost?
The action of microorganisms produce heat in hot compost. As time progresses different organisms are at work on the compost and the temperature changes. Contrary to what I once thought, worms don’t really come along until near the end, along with lots of other insects and other invertebrates. If you are really dedicated you can use a compost thermometer and track the compost as you go and perfect the composition to get hot compost, just ensure the compost heap does not go above 65˚C and kill beneficial microorganisms in the pile.
Cold compost is a compost heap that slowly matures. It can take quite a long time but is useful if you don’t have a lot of material or time to compost. Just be aware that if you have seeds, invasive weeds or diseased material in a cold compost it will likely survive the process.
What is the nitrogen and carbon mix all about?
When making compost, the plants you add will be a combination of fresh greens and dried brown material, or somewhere in between. The browns are the carbon-rich ingredients – straw, hay, dried grass clippings, chipped branch wood, dried spent plants from the garden. The greens are the high nitrogen ingredients – freshly harvested green plants, green crop residues, vegetable peelings, green weeds (not in seed if you’re making cold compost), comfrey leaves and green grass. Note, that as greens dry and age, they drop in nitrogen levels.
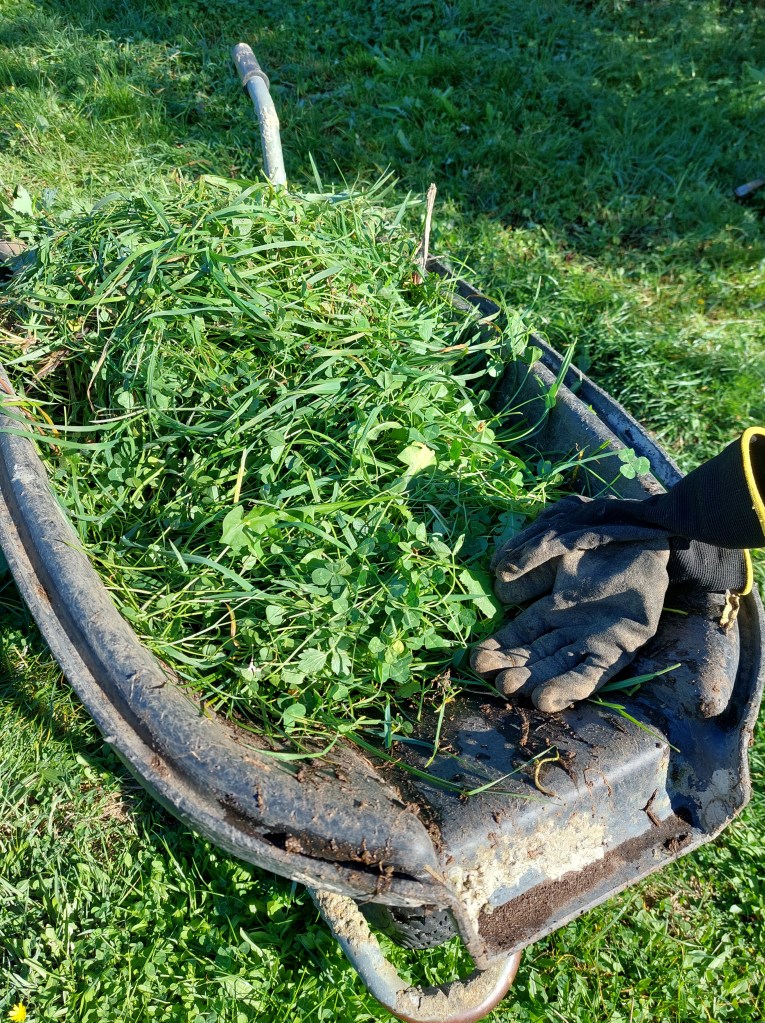
Freshly scythed ‘greens’ for the compost.
You may have read about specific ratios of carbon to nitrogen in the compost materials such as 30:1, but it can be confusing and can make things more difficult to follow. This is great for the professional to master. But in the garden, I am all about keeping it simple.
The more carbon ‘brown’ materials in the compost the longer it will take, and some browns take a very long time, such as a pile of woodchips. If there are too many high nitrogen ‘green’ materials, such as too much fresh grass, you will get an anaerobic process and it will get smelly and compact. I try for a fairly standard mix of about one-third green and about two-thirds brown material. I keep a pile of brown materials and use them when I am ready to build a pile, but the greens don’t really keep, so I need to have these ready – generally after I have done a harvest. But remember you don’t have to do a layer method and can just add to the pile as you go, if the balance is not right turn and add more of another material.
Reducing the size of the material you add to the compost will also speed up the composition as it provides more surface area for the microbes and just chopping things up with a spade will help.
Making hot compost; layer, water, cover and turn
To make hot compost create layers with browns and greens, adding a spade of dirt in between each layer as this helps with microbiology – I can’t verify this, but it is simple to do and doesn’t hurt.
Start with a layer of sticks and twigs to allow air to circulate.
Build up with layers of greens and browns about a 10cm thick.
Water each layer – unless the material is already wet.
Top the last layer with another spade of dirt.
Once it is at least one metre square, cover it with a compost cover, to reduce all the nutrients washing away in heavy rain. I would recommend purchasing a compost over if you can, as a good compost cover will allow moisture in while also allowing the compost pile to breathe, but a shade cloth or sacks are also good.
Turn the compost piles several times in the first month or so, adding and checking moisture levels and aerating. Then I only turn occasionally as I want the compost to do its thing. However there is debate and there’s nothing wrong with not turning and experimenting.
One piece of advice? Don’t be afraid – it’s a bit like cooking- some like to research in depth and follow very specific recipes, others like to experiment. Many things will impact on the pile, the time of year, materials you have, size of the pile and your own your interest.
The compost is ready when there is no warmth left, it is a nice crumbly texture, and things have broken down in the pile. I have found a good hot pile can be ready within a few months, but I tend to leave it for about six months. A slow cooler pile can take 12 months or more. However, if the compost is not ready it will also stop things doing well in the garden. Sometimes even brought in compost is not quite ready and can benefit for some more time in a pile or mixed into your own compost and left to completely mature.
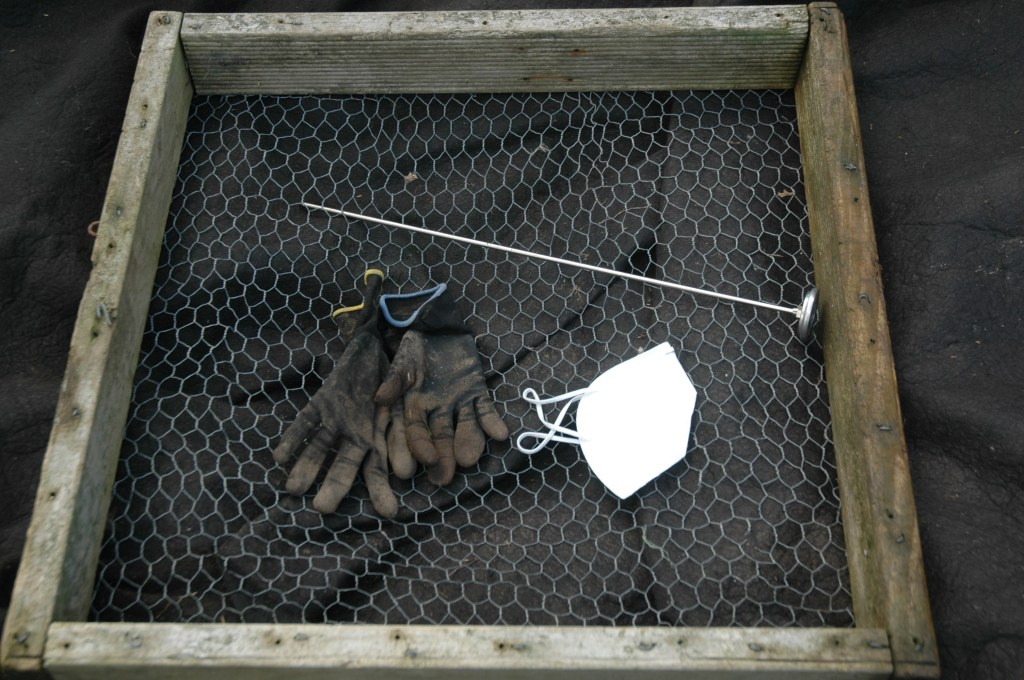
Should you wear gloves when making compost?
Yes, always wear gloves, and that’s not all. While you are perfecting the health of your compost pile make sure you keep your own health in mind. Wear a tight-fitting two-strap mask and garden gloves when making and working with compost and wash your hands well. Keep the compost moist when working with it to reduce dust. Remember a compost pile is full of living organisms and dust that you do not want to breathe in and can result in serious illness.